Wednesday, 26 September 2012

Tool Time

        Ever come across a recipe that asks you to zest something? What about when you're asked to shred a small amount of an ingredient, or a small ingredient? No one likes trying to clean those large, boxy cheese graters! So, here's a solution! It's a hand-held stainless steel grater by Jo!e (it also comes in a mini version). This tool comes in so handy, I use it on an almost daily basis.

        Need to zest some citrus? Use this! Need to press some garlic? Just use this and shred it! Need to grate some Parmesan over your pasta? Perfect tool for that too. Need to make a garnish? Just use this to make long ribbons of whatever you need! See, this tool is good for almost anything!

      "Now," you ask, "where can I purchase this amazing kitchen tool?" I received mine as a gift from Momma O. Where she finds these things is any ones' guess.

      Actually, she purchased it at a little shop in Kingsville, ON called Cindy's Garden. They have a wine variety of nifty little kitchen tools. But, you can also purchase them online from Jo!e's website. I have seen them at Placewares in St. Lawrence Market as well. They come in 3 colours: orange, blue and green.

       Tools in the kitchen that help make our lives easier are always welcome. You can buy this for you, or for a friend. Paring this with other kitchen gadgets in a gift basket would make a great housewarming gift. If you're interested in having me put together a gift basket for you, please contact me.

                                                                                     Enjoy!
                                                                                        Mel

Monday, 24 September 2012

When the Moon Hits Your Eye Like a Big Pizza Pie

That's Amore. When the world seems to shine Like you've had too much wine That's amore.


         Oh Dean Martin, how you have given us so much deliciousness to use in the kitchen.


         Momma O came to visit this weekend, and what better way to enjoy each other's company than in the kitchen with a bottle of wine? Okay, maybe it was 2 bottles of wine. I can't think of any other way to do it! We were thinking and thinking of what to have for dinner.  It was just going to be the 3 of us; My Dad was here too but Mr. P was away on business and wouldn't be returning until late.  We finally decided upon a pizza that Momma had eaten with her sister in Calgary. After a quick grocery run, we were ready to go.


First, we had to start with the dough, as that takes some time to rise.


The Dough
1/2 cup room temperature light cider (beer, or sparkling wine work just fine as well)
3/4 cup lukewarm water
1 1/2 tsp. instant yeast
1 tbsp. honey
2 3/4 cups all purpose flour
1 tsp. salt
2 tsp. olive oil
  1. In a bowl (I use a 2 cup measuring cup), combine the cider, water, yeast, and honey. Stir and let stand until frothy (about 5 minutes).
  2. In a medium sized bowl, mix the flour, salt, and any other spices you'd like to add to your dough (I added a couple pinches of a Greek herb mix). Drizzle the oil into the flour mixture, stirring with a wooden spoon to spread it around. 
  3. Add the yeast mixture and mix until a soft ball is obtained. (I generally just get in there with my hands and mix, it's much easier).
  4. Remove the dough from the bowl and knead a few minutes while flouring to avoid sticking.
  5. Place the dough in a large, lightly oiled bowl, and cover with a clean cloth. Let rise for about 1 hour in lukewarm area away from drafts.
  6. Using hands, divide dough into 2 equal parts (if you'd like).
  7. Use dough immediately, or lightly oil before storing in a plastic bag. It can be refrigerated for up to 12 hours, or frozen.
As the dough is rising, chop up all the other ingredients you'll need and do your dishes, that way you're ready to roll (no pun intended) when the dough is done.

To prepare the dough for toppings:
  1. Lightly flour your CLEAN counter.
  2. Knead the dough a bit and form it into a ball.
  3. Using a rolling pin or wine bottle, flatten the dough into the desired shape. If you're making it on a cookie sheet you might want to do a rectangle. Make sure to roll it so it's larger than the pan you're baking it on.  The excess will form the crust.
  4. If you're using a pizza stone: sprinkle corn meal over the stone and carefully lay your rolled dough over top.
    If you're using a pizza pan: Lightly oil the pan using a spray or a paper towel coated in oil. Sprinkle corn meal over the pan and carefully lay your rolled rough over top.
    If you're using a cookie sheet: Place parchment paper over the pan. Sprinkle corn meal over the pan and carefully lay your rolled rough over top.
  5. Roll the edges of the dough so they no longer hang over the edges of the pan.
  6. Now, you're ready to start adding toppings.
To bake your pizza preheat oven to 425°F, place your pizzas in the oven and bake until cheese is bubbly and crust begins to brown.

Popular Pepper Pizzas
Classic Pizza

1. Spread Pizza sauce over the prepared dough.
2. Sprinkle some cheese over the sauce.
3. Place sliced pepperoni, peppers, onions, and mushrooms over the cheese and sauce.
4. Sprinkle the remainder of the mozzarella cheese over the toppings.
5. Bake until cheese is melted and golden.


Roasted Red Pepper Pizza
  1. Preheat the oven to 400 °F. Make alternating layers of bell peppers, chilies, onion, and garlic in a shallow baking dish. Drizzle with olive oil.
  2. Cover and bake for 50 to 60 minutes, or until the peppers have softened. Remove the lid and reduce the temperature to 350 °F. Bake for an additional 45 minutes, or until the peppers are very soft and beginning to char.
  3. Cut chicken breast into strips and fry with your choice or seasonings. Use water instead of oil to help keep the chicken moist.
  4. Spread pizza sauce on prepared dough. Sprinkle shredded mozzarella cheese over sauce then lay chicken breast strips, peppers, and onions over top. Sprinkle the remainder of the cheese over the pizza and bake. 

Greek Pizza


1. Spread Greek Salad dressing over prepared dough (Greek herb mix, red wine vinegar, salt, pepper, and olive oil).

2. Cover the oil with fresh spinach.

3. Cut grape/cherry tomatoes in half and place on spinach.

4. Cut good Kalamata Olives in half and spread over the spinach and tomatoes.

5. Sprinkle diced peppers (we used 1 fresh cayenne and 1 sweet pepper) over olives, spinach and tomatoes.

6. Sprinkle cubes of feta cheese over the pizza.
Bake until crust and feta begins to brown.

Enjoy!
Mel


Tuesday, 18 September 2012

On Top of Spaghetti, all covered with cheese, I lost my poor meatball, when somebody sneezed!

      Okay, so there was no sneezing and no losing of meatballs, although maybe there were some lost marbles. In fact, there was a lot of finding meatballs, and probably still a lot of lost marbles.

       Mr. Pepper starts his new hockey season today, and he has to eat pasta before each game in order for it to be a successful game. I actually mentioned this to his mum, and she laughed (I know, you're probably laughing too), but she was able to enlighten me on where this tradition came from. When Mr. Pepper was just a young lad he played an excellent game, scoring 3 goals (a hat-trick), and after the game one of the other boys' fathers' asked him what he mother had fed him. The young Mr. Pepper replied,  "Spaghetti". The man told him to keep eating it, and so he did.

     Here's what you need

2 lbs of ground beef (I use 1 pound of ground beef and 1 pound of ground pork)
1 chopped onion
Les Ingredients
2-4 cloves crushed garlic
3 tbsp. sugar
1 large green pepper, chopped
2 - 10oz cans of mushrooms, strained (or about 4 large white mushrooms)
2 - 28oz can crushed tomatoes (drained) - If you're using whole tomatoes, just crush them in your hand
2 - 5 1/2oz can tomato paste
1 - 7 1/2oz can tomato sauce
1 bay leaf
2 tsp basil
1/4 tsp ground pepper
1/3 cup grated Parmesan cheese
 Salt to taste (not too much because it as it cooks down the flavours will become more concentrated. I suggest adding this closer to the end of cooking time)


Pork Beef and Onion
Here's what you do:


    Add a splash of oil to a pan and saute the onions until softened and add half the garlic.


    Cooking up the good stuff


    Add the ground beef and sugar to the pan and brown.


    In the crock pot


    Strain the cooked ground beef and mix the ground beef mixture with the peppers, mushrooms, remainder of the garlic, tomatoes, tomato paste, tomato sauce, spices and cheese in a large bowl.
    Transfer to your slow cooker.
    Throw in a dried hot pepper for a little bit of heat.
    Cover and cook on low for 6-8 hours.


         "What about the meatballs?" you ask. Well, they are super easy too.

     Here's what you need.

    1 pound ground beef
    1 pound ground pork (you could do 1/2 veal, 1/2 pork if you wish)
    2 cloves minced garlic
    2 eggs
    1 cup freshly grated Romano cheese (I used Parmesan)
    1 1/2 tbsp chopped Italian flat leaf parsley
    salt and ground black pepper to taste
    1 to 1 1/2 cups Italian bread crumbs (I used 2 cups, and found it to taste too bread-y)
    1 1/2 cups lukewarm water (I used the leftover tomato juice from making the sauce)

    Mixing Ingredients
    Here's what you do.

      Combine meats in a large bowl.
      Add garlic, eggs, cheese, parsley, salt, and pepper.


      Mixing meat and breadcrumbs


      Blend bread crumbs into meat mixture. Slowly add the water 1/2 cup at a time. The mixture should be very moist but still hold its shape if rolled into meatballs (I only used 1 cup of the leftover tomato juice). 

      Rolling balls


      Shape into meatballs. They shouldn't stick to your fingers. If they do, you they are too moist and need some more bread crumbs.


      Now, I tried cooking them 3 different ways.

      Frying up the balls

             The First Way - Heat 1 cup of olive oil in a large skillet. Fry meatballs in batches. When the meatball is very brown and slightly crisp remove from the heat and place on a paper towel (to drain the grease). If your mixture is too wet, cover the meatballs while they are cooking so that they hold their shape better. They stuck to the bottom of the pan, even with all that oil and started to burn. The outside looked good, but the insides were still a little raw. Maybe I had the heat to high, maybe I tried to turn them too early, but this (in my opinion) was a failure. You might have more luck, but from here I moved on to try another way.
      Left Side - First Way
      Right Side - Second Way


      The Second Way - Put a bit of oil in the bottom of a frying pan and fry up the meatballs in batches until they are golden brown. Cover them with a grease screen and place in the oven at 350°F for 30 minutes or until done. (I'm bad with setting the timer). This one was really good. It was still a little greasy, but it browned the outsides nicely and cooked the insides well.


      The Third Way Finished
      Getting the third way ready
      The Third Way - Line a baking sheet with parchment paper and place meatballs on the tray. Place in 350°F oven and bake for 40 minutes or until done. (I'm bad with setting the timer). After 20 minutes make sure you flip them. These are Mr. Pepper's favourite. They are crunchy on the outside and nice and moist on the inside. Watch them carefully to make sure you don't over cook them.

              I portion out the spaghetti sauce and meatballs and freeze them in smaller portions so that on hockey night we can just just defrost the bag and empty the contents into a saucepan. Serve over your favourite type of pasta.


                                       Enjoy!
                                                 Mel


      Thursday, 13 September 2012

      Sexy Cookies


      Fancy Pants
              Everyone loves cookies! And what better type of cookie to love than sexy cookies? Yes, you read properly, sexy cookies. We're talking bra and panty cookies. Miss McGrath called me up a few weeks back and we decided to make cookies for her girlfriend's bachelorette party. She already had the idea, and knew what she wanted them to look like, all we had to do was harness our talents and make them.


              First, gather your ingredients and a hand mixer. The hand mixer (or stand mixer) is key, unless you have a few friends to share the duty of mixing. We used a new sugar cookie recipe, and we found it to be very crumbly, but this could have been because we lacked the hand mixer. I won't give you that recipe, instead, I'll give you the recipe for my tried-tested-and-true sugar cookies.


      Sugar Cookies
      1/2 cup shortening (or you could just use room temperature butter)
      1/3 cup margarine (or you could just use room temperature butter)
      1 cup sugar
      2 eggs
      1 tsp vanilla
      2 1/4 cups flour
      1 1/2 tsp baking powder
      1/4 tsp salt

      Fly by the seat of your pants
      1. Using your hand mixer or your stand mixer cream shortening (butter), margarine (butter), sugar, eggs, and vanilla until creamy. 
      2. Sift and measure the flour (sifting the flour breaks up clumps and adds air to the flour which helps produce lighter cakes and pastries, and makes measurement more uniform).
      3. Sift together flour, baking powder, and salt (sifting here helps to incorporate the dry ingredients).
      4. Add flour mixture gradually to sugar mixture. Beat at low speed until blended (if you have the mixer on high when you add the flour you will get a face full of white powder).
      5. Cover dough and chill for 1 hour in the fridge or 10 minutes in the freezer (this is necessary to re-solidify the fat which is necessary for you to roll it out).
      6. Do all your dishes and tidy the kitchen (this step comes from Momma O).
      7. Preheat your oven to 375°F. 
      8. Lightly flour your clean counter top and roll out your dough using a floured rolling pin (if you don't have a rolling pin, a wine bottle covered in plastic wrap works just as well). Don't roll it too thin, about 1/4" thick.
      9. Using a heart shaped cookie cutter, cut the dough. Reroll the dough until no dough remains. Cut the triangular tips off half of the hearts.
      10. Bake on an ungreased baking sheet for 8 to 10 minutes until edges are light brown.
      11. Cool slightly then remove from pan with lifter and place on wire rack to cool.

              Now that your cookies are baked, you must wait until they are fully cooled before you start to ice them. While the cookies were cooling, Ms. McGrath and I googled images of the designs that she wanted to cookies to look like. Once we had our idea, we made the icing.

      Royal Icing
      4 cups of confectioner's sugar (icing sugar)
      3 tablespoons meringue powder
      1/2 tsp vanilla (or almond) extract
      Gel paste food colouring

      1. In a large bowl, combine the sugar, the meringue powder, 1/2 a cup of warm water, and the extract. Using an electric mixer (hand mixer) on medium speed, beat until the mixture is fluffy, yet dense (about 7-8 minutes).
      2. To thin the icing, use a rubber spatula to stir in additional warm water, 1 tsp at a time. To test the consistency, drizzle a spoonful of icing into the bowl; a ribbon should remain on the surface for about 5 seconds.
      3. Separate the icing into different bowls (use as many bowls as colours you would like to use). Using a toothpick add the desired colours to the bowls of icing and mix well.
      4. If you don't use all the icing you can store it covered in the refrigerator for up to a week. Remember to stir it vigorously just before using.

              Fill your different piping bags with each of the different colours. Start icing by outlining the area you want to ice, once you've done the outline, wait just a minute, then fill it in with the colour of your choice. Once it dries you can add second and third colours for a layered look. To make the super tiny dots and lines, use a toothpick.

      Scaredy Pants

      For a marbled effect
              Pipe your icing around the border, then pipe the icing into the middle of the cookie, letting it run to the edges of the border. While the icing is still wet, pipe various sizes of dots and lines in 1 or 2 different colours on top of your first colour. Using a toothpick or a skewer, quickly swirl the colours together, making only 8 to 10 figure 8 motions and stopping before the colours are completely combined. Gently tap the cookie to settle the icing.


      For a polka dot effect
              Pipe icing around the edge of each cookie and then pipe the icing into the middle of the cookie, letting it run to the edges of the border. While the icing is still wet pipe dots of various sizes in different colours into the icing. Gently tap the cookie to settle the icing.


              Take your time, don't rush, and have fun with it. Make them as sexy or as modest as you want. Make sure you let the the cookies dry completely, for at least 6 hours or up to overnight before stacking.

                                                                                    Enjoy!
                                                                                       Mel

      Thursday, 6 September 2012

      Movie Night

      "We make sacred pact. I promise teach karate to you, you
      you promise learn. I say, you do, no questions."
      - Mr. Miyagi in The Karate Kid 


             What goes hand in hand with a good movie? POPCORN! With T.I.F.F. starting today, I thought, "What better way to kick things off with some good old fashioned (and creative) popcorn recipes?" Okay, so, I didn't make the popcorn today, but I thought I would share it with you today. I actually made it last Wednesday when Mr. Pepper, Mr. Walker and myself went to a screening of The Karate Kid. I'm not talking about the new one with Jackie Chan and Will Smith's son, I am talking about the original 1984 version. And, what's better than watching an original? Watching an original with fancy popcorn creations!


      Old Fashioned Caramel Corn
               First, pop your popcorn, for the recipe below you'll need about 5 quarts of popped corn, which is a lot. You can always just 'eyeball it' which is what I typically do. You can use microwave popcorn, you can use store-bought  popcorn, you can use kettle corn, you can use the Jiffy-Pop stuff you make camping, or you can do it by hand on the stove-top. Whatever method you are most comfortable with works well.

      Old Fashioned Caramel Corn
             Next, preheat your oven for 250°F and place the cooked popcorn in a very large bowl (believe me, don't pick the small bowl or you will be eating your popcorn off the floor and the counter). In a medium saucepan over medium heat, melt 1 cup of butter (movie popcorn isn't supposed to be healthy). Stir in 2 cups of brown sugar, and about 1 tsp of salt. (If you want, you can also add a 1/2 cup of corn syrup, but I don't think it needs it). Stir this mixture constantly until it is boiling. STOP STIRRING. Boil without stirring for 4 minutes (if you keep stirring it will crystallize and won't look good). Remove from heat and stir in 1 tsp of vanilla extract (you can also add a 1/2 tsp of baking soda, but I didn't, and it was fine). Pour in a thin stream over popcorn, stirring to coat (this is why you'll be glad to have a big bowl).

               Then, spread out your mixture on cookie sheets and bake in your preheated over for about 30 minutes to 1 hour, stirring every 15 minutes. (If you like it a little chewy, go for the 30 minutes, if you like it crunchy go for the full hour). Remove from oven and let cool completely before breaking into pieces.

      Bacon Popcorn
                 Yes, you read correctly. What goes better with bacon than, well, everything is better with bacon! Popcorn shouldn't have to lose out because its healthier than your average snack.

      Oink! Oink! Pop!
                First start by frying up some good old bacon in a large frying pan. Do however much you'd like, but whatever you do, DO NOT get rid of the drippings (that's the key ingredient). When your bacon is good and done, remove it and set it aside. Now, pour in your popcorn kernels (this one has to be done the old fashioned way). Cook the popcorn in the bacony-goodness according to your kernel can instructions. (Depending on how much grease you have, you might need to add some butter or olive oil to have the correct amount to pop the kernels). Once the popcorn is popped, place it in a large bowl. Chop up your bacon into small pieces and put into a smaller bowl. Add some melted butter and some salt (I use salt-free butter and sodium reduced bacon so I feel it still needs a little kick), mix and them pour over your popcorn mixing well. Adjust the seasons as you see fit.

                Popcorn is so delicious, especially when you add unique ingredients Cayenne pepper, garlic butter, dill butter, cheese are all some suggestions. Be creative, give it a shot. And, if you're looking for a beverage other than soda to drink with your popcorn on movie night, give this tea a try.

                                                                                                         Enjoy!
                                                                                                              Mel


      Wednesday, 5 September 2012

      "I'm not making art, I'm making sushi."

             These are the words spoken by Masaharu Morimoto, America's best Iron Chef. However, sushi really is an art, and it takes a lot of skill to do it well. Despite the fact that I am a woman, and I lack the many years necessary to become a sushi master, I enjoy making sushi (not to mention eating it too). Maybe it's due to my lack of experience (and maybe because the fish market can be so overwhelming), but I avoid making my sushi with raw fish. Instead, I make my sushi with a simple combination of cucumber, mango, and avocado.

      Here's how I do it.
             First, gather your ingredients.  Some are not what you would normally have in your cupboard, so you might need to hit up the local grocery store. You will need:
      The Ingredients

        1. Rice vinegar - I used about a tablespoon
        2. Sushi rice (I prefer Kokuho Rose) - I used 2 cups
        3. Avocado - I used 1/4
        4. Ripe mango - I used 1/4
        5. Cucumber - I used 1 mini one
        6. Water - I used 2 and 1/3 cups in the rice cooker
        7. Nori paper (seaweed)
                Next, rinse your rice VERY well. I use a strainer so that I can swish it around with my hands under running water. When the water runs clear out of the rice, you're ready to get cooking.

               Cook the rice according to the package or rice cooker instructions. Make sure you add a bit of extra water because you don't want to have those delicious toasted pieces on the bottom.When the rice is finished cooking add a few splashes of rice vinegar and mix it well. Remove the rice from the rice cooker and spread on a cookie sheet to cool.

      Delicious Filling


            While the rice is cooling, prepare your filling. You'll want to cut everything as close to a julienne as possible (like a matchstick). The cucumber will need to be de-seeded, as the seeds can make the sushi too watery, and, if you want, you can peel your cucumber too. I like the texture, so I leave the skin on. Once you have everything cut up and your rice is cooled, you're ready to start rolling.


      Rolling in the deep
                When I was in Japan, I purchased a couple of sushi rolling mats. These are super handy, but, if you don't have one, don't fret, you can still do it by hand. Line the mat with plastic wrap (the pros use this too as it stops the filling from getting into the bamboo slats), and place a piece of nori paper on top. Wet your fingers a little, not so they are dripping, but so that they are coated. This will help the rice to not adhere to you. Wet them whenever the rice starts to stick to your fingers. Pick up some rice and spread it evenly over the nori paper, leaving about a 3/4 to 1 inch at the top (you can press it down tight if you'd like). Lay your filling over one end of the rice, and rinse and dry your hands.


      Rocking and a Rolling 


               Starting at the filling end pick up the plastic wrap (and your mat if you have one), and curl it over the filling (this part takes some practice). Carefully, roll the nori paper, rice and filling into a cylinder. Using some water, (or use the fleshy portion of the mango peel) dampen the little strip of rice-less paper and finish rolling. Place the cylinder seam side down on a plate. Finish rolling all your others (you're last one will look the best, I promise).


      Rolling on a river


               Cutting the sushi rolls you have worked so hard to prepare is the final challenge you must face. Make sure that you have a very sharp knife and a damp cloth or paper towel. Every time you make a slice through your roll, wipe off the knife to remove the sticky 'gunk' left by the rice. It works best if the knife is wet, so don't dry it off. You might find that using a firm sawing motion works best (I do) as it's very easy to squish the sushi rolls you've just painstakingly prepared.


               Serve with some wasabi and soy sauce.

                                                                                                Enjoy!
                                                                                                    Mel


      Tuesday, 4 September 2012

      Grilled Apples

      Ice cream is delicious on its own, but when added to enhance something you've grilled, it's like magic!

             I have grown up loving everything grilled, maybe it's because of my summers spent on Pelee Island at the cottage (we don't have an oven there, just a BBQ and a campfire) and my family was pretty adventurous when it came to creating meals. We didn't just eat the rudimentary hot dogs, hamburgers, and sausages (although those were a pretty big staple), my parents were pretty experimental when it came to what could and couldn't be grilled. Let me tell you, there isn't much that cannot be grilled. My feelings are, if you can bake it in an oven, fry it on a stove, then you can cook it on the BBQ.

            One of my favourite items to grill, other than meat, is fruit. "Fruit?" you ask, "Seriously?". Yes, fruit. You only need a few ingredients and it's super simple, and quick to prepare. Pineapple is a very popular fruit to grill, as the sweet juices caramelize quickly and it adds a nice smoky flavour, especially when added to a salad or a burger. (I've never grilled pineapple, but I've read in multiple places that this is the case). Peaches and pears are also excellent fruits to grill, (this is from experience).

      How to Grill Stone Fruits
             A stone fruit (such as a peach) is very sweet and must be monitored carefully with the lid open when on the grill.

      1. Wash the fruit (make sure it's a firm one. A soft fruit will have too many sugars and might get too mushy too fast.)
      2. Quarter the fruit, removing the pit. Or, if you're talented, cut it in half horizontally, remove the pit and slice into rings.
      3. Coat the fruit with a mixture of cinnamon and butter.
      4. Preheat the grill to about 350°F (Let's be honest, you're already grilling, so whatever temperature you've got the grill at should be fine)
      5. Place the peaches on the grill and leave them for about 3 minutes. DO NOT turn them or move them or check them. You want the natural sugars to caramelize, which will give you great grill marks.
      6. Flip them and repeat 5 for each side. (If you've cut it into rings, you might notice them getting mushy faster, if so, flip them earlier and remove earlier)
      7. Serve with ice cream or eat without and enjoy!
      How to Grill Pome Fruits
            A pome fruit (such as an apple or pear) is crunchy and sweet and generally needs a little longer on the grill compared to a stone fruit. The steps to grill them are the same, but you will want to grill them for about 5-6 minutes a side rather than 3 minutes.

      How to do Grilled (Baked) Apples
            Now that you've experimented with grilling fruit, you want to try something a little more adventurous. 
      Grilled Magic!
      1. Choose an apple that stands straight without rocking and wash your apple.
      2. Core the apple, but make sure don't go all of the way through the bottom (leave about an inch).
      3. In a small bowl, mix some brown sugar, cinnamon and butter together. 
      4. Stuff this mixture into the apple where the core used to be. Do not rub this on the skin around the outside of the the apple, if some is on it, it's okay, but try to be neat.
      5. Preheat the grill to about 350°F (Let's be honest, you're already grilling, so whatever temperature you've got the grill at should be fine)
      6. Place the apple on a pie plate on the BBQ and pour about an ounce of spiced rum over the fruit, and into the pie plate. 
      7. Close the lid and wait. Obviously you'll be checking whatever else is on the grill, so you can check the apples at the same time.
      8. When you notice that the rum has been burned off of the pie plate remove the apple, dispose of the plate and place the apple directly on the grill.
      9. Close the lid and wait. It should take about 30 minutes from the time you put it on the grill for it to be finished. If you notice that it is getting really soft, it's okay to remove it earlier.
      10. Add a scoop of ice cream, and maybe some caramel sauce, and enjoy!


      Saturday, 1 September 2012

      Homemade Ice Cream

           Hmmm, so much good food in the past few days, I'm not quite sure where to start.... Ice cream, ribs, apples, chicken, popcorn... let's start with dessert.

      My beautiful baby
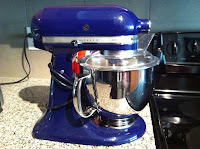
           Mr. Pepper loves gifts that benefit him (he's sweet). So for Christmas 2010 he purchased me a Colbalt Blue Kitchenaid Mixer. You see, this benefits him because now I can bake and he reaps the rewards. And, oh how he has reaped them, between cakes, cookies, brownies, and cinnamon buns, Mr. Pepper has been my faithful resident taste-tester, a job that he eagerly accepts. Then, for Christmas 2011, Mr. Pepper gave me a Kitchenaid Ice Cream maker. See, another gift that he benefits from, so now, between all the cakes, cookies, etc, he has added homemade ice cream taster to his repertoire.

             On Tuesday I decided to make some ice cream, and it's about a 2 day project (it's tough when you want the ice cream right now). Tuesday morning I put the ice cream making bowl in the freezer. It has to freeze solidly, so make sure you remember to do this... it's horrible when you go through all this work and remember that you forgot to freeze the bowl. I made this portion of the recipe on Tuesday afternoon, and finished it off on Wednesday.

      The ingredients


             So, the recipe (pretty much the one that came to with the mixer, but with less vanilla):
                • 2 1/2 cups half-and-half
                • 8 egg yolks
                • 1 cup sugar
                • 1/2 cups whipping cream
                • 3 tsp vanilla
                • 1/8 tsp salt

      The mixture


      1. Heat half-and-half until very hot, stirring often. DO NOT BOIL. Remove from heat.
      2. Whisk yolks and sugar on speed 2 until blended and thickened. Gradually add hot half-and-half. Mix well.
      3. Return mixture to saucepan and cook over medium heat stirring constantly until small bubbles form and mixture is thick on the back of a wooden spoon. DO NOT BOIL.
      4. Transfer mixture to a mixing bowl and stir in whipping cream, vanilla and salt. Cover and chill thoroughly (at least 8 hours).
      The inspiration


            Wednesday afternoon I was getting ready to put it into the ice cream maker when I had a brainstorm, "What if I made it rippled?" "Rippled you ask?" "Yes, with berries." So off I went to find a recipe. Luckily the August 2012 issue of Chatelaine had a recipe.


      The berry syru
      1. Combine 2 cup of berries (they suggested blueberries, I used frozen 'power berries' - a combination of blackberries, cherries, raspberries and pomegranate) with  1/2  cup of honey and 4 tbsp lemon juice in a saucepan.
      2. Set saucepan over high heat and bring to a boil.
      3. Reduce heat to medium and gently boil, stirring occasionally, until syrupy, about 10-15 minutes (because my berries were frozen I found that there was  still a lot of liquid left over, so I let it simmer for longer to cook off the liquid).
      4. Transfer to a metal bowl and chill in the freezer for about an hour. 
            
      My gift at work
      Now that the ripple was chilling, I started prepping for ice cream making.

      1.   Attach the frozen bowl and dasher (that's the mix head) to the mixer and turn to "stir" (speed 1). Using  a container with a spout, pour the ice cream mixture into the freeze bowl. Continue on stir for 15-20 minutes (I generally go a bit longer) or until desired consistency.
      2.   Alternate adding layers of ice cream and the syrupy mixture into your container of choice before freezing.
      3.   Freeze.


      Yield: 16 Servings

      When serving, let stand at room temperature until slightly softened, about 10 minutes before attempting to scoop.


      Enjoy!
      Mel