Friday 26 July 2013

Fruit of the Sea Gumbo


        Shrimp are a delicious addition to many meals and can be served in a variety of ways. They are common in the cuisine in many different cultures and can be served on their own, as in a shrimp cocktail or grilled on the BBQ, in a pasta, in a soup, or mixed together with other proteins and vegetables, as found in Laksa.

Black Shrimp


        Before you start to cook with shrimp, you should know exactly what it is that you are eating. A shrimp is a crustacean with a long narrow tail, long whiskers and stalk eyes. Other crustaceans, such as lobsters and crabs, are strong walkers with thicker legs, whereas shrimp have slender, fragile legs that are used for perching. They are often found feeding near the seafloor on most coasts, in estuaries, and can even be found in rivers and lakes. They swim forwards by using the ‘swimmerets’ found on the underside of their abdomens. The terms “shrimp” and “prawn” are often used interchangeably.


         Now that you know what a shrimp is, the next challenge is trying to figure out what type of shrimp to buy. When you visit your local fishmonger, you’ll see that he will have his shrimp categorized according to size, with little in terms of breed variety. Let’s start with size, then we’ll talk about species. The smallest shrimp commonly sold are called ‘cocktail’ shrimp. These are often sold precooked and frozen, and are typically the cheapest. They are commonly used in salads. Prawns will go up gradually in size, and in price, from this small cocktail size, to jumbo, and sometimes you can even find gigantic (which look like small lobster tails). Depending on what you are doing with the shrimp can help you decide the size you should get. Your fishmonger might be able to help with this too.
White Shrimp


         There are two species of shrimp that I commonly see at St. Lawrence Market when I wander through the vendors: Black Tiger shrimp, and White shrimp. The White shrimp (which could be either the Pacific White shrimp, or the Atlantic White shrimp) is found in waters that don’t fall below 20oC. The Black Tiger shrimp is an Indo-West-Pacific shrimp, although it is now also an invasive species in the Gulf of Mexico. This is probably the most widely known type of shrimp, although its popularity is decreasing due to the rising popularity of the white shrimp.


        Within each of these varieties you also have farmed, cultivated, and wild shrimp. According to Bubba in Forrest Gump, "shrimp is the fruit of the sea" and after learning about all the different types and sizes, you can see why. Bubba was from Bayou LaBatre, Alabama and gumbo is a popular dish down there.


So, here’s what you need to make Shrimp Gumbo:

¼ cup all-purpose flour
1 tbsp butter
1 cup chopped onion
1 cup chopped green pepper (or any other colour pepper)
½ cup diced celery
2 tsp minced garlic
3 cups sodium reduced chicken broth
1 can (19oz) no-salt-added diced tomatoes (drained)
1 cup diced okra or zucchini
1 tsp dried turmeric or cumin
½ tsp paprika
½ tsp dried thyme
½ tsp dried oregano
¼ tsp salt
¼ tsp black pepper
⅛ tsp cayenne pepper
1 lb uncooked large shrimp, peeled, deveined and tails removed
4 cups hot cooked brown rice

1. Sprinkle flour over bottom of a small pie plate and toast at 400oC for 15-20 minutes until golden brown. Stir once or twice during cooking time. Remove and set aside to cool. 

2. Melt butter in a large, non-stick pot over medium-high heat.

3. Add onions, green pepper, celery and garlic. Cook and stir vegetables begin to soften (about 3 minutes). 

4. Stir in toasted flour and cook for 1 minute.

5. Add broth and mix well. 

6. Add drained tomatoes, okra, cumin, paprika, thyme, oregano, salt, pepper, and cayenne. 

7. Bring to a boil. Reduce heat to low. Cover and simmer for 20 minutes, stirring occasionally.

8. Add shrimp and simmer for 5 minutes, until shrimp is cooked through.

To serve: Spoon rice into individual serving bowls and ladle gumbo over top. Serve hot.


Tips:
  • Toasting the flour in the oven is a little healthier than making a traditional roux with oil and flour.
  • I cut up the shrimp into smaller pieces because I prefer to have many bites with some shrimp rather than few bites with big shrimp.
  • We’re not big on the smell of cumin, so I use an equal amount of turmeric.
  • Okra can be tricky to find, but it’s a great thickening agent. If you use zucchini, your gumbo won’t be as thick, but you can just add some cornstarch (mix it with some water to make a loose paste before adding it to the gumbo to avoid clumps).
  • Last time I made it, I added both okra and zucchini. Nothing wrong with extra veggies.
  • Depending on how spicy you want it, you can add whatever kind of hot peppers you want. First time I made it, I added just a bit of cayenne flakes. Last time I made it, I added a jalapeño. Both times were delicious with a different kind of heat.


Makes 6 big servings at about 316 Calories per serving (6 WW points)

                                                                                                                                                              Enjoy!
                                                                                                                                                                       Mel
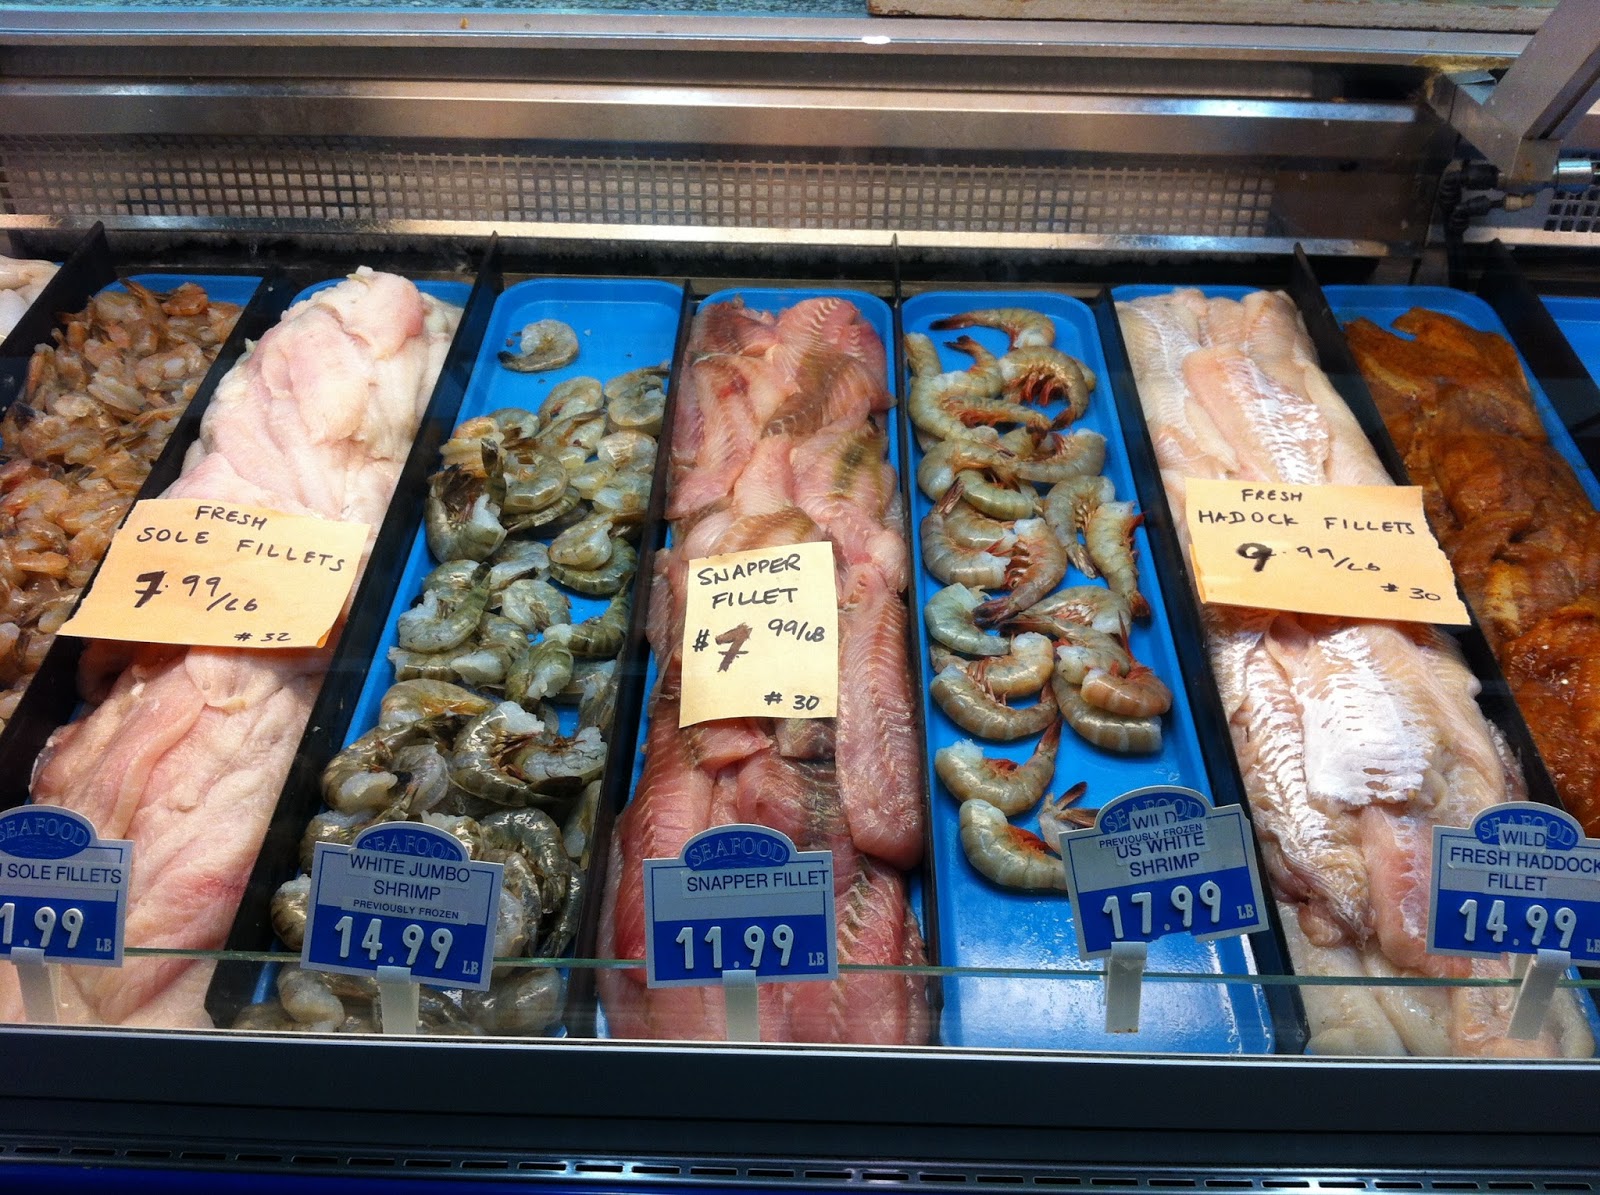
Dominic's Fish Market @ St. Lawrence Market, Toronto


Thursday 23 May 2013

Bacon Bacon Bacon


      Everyone knows that bacon makes everything better. A cheeseburger is good, but make it a bacon cheeseburger and it's even better. A breakfast staple is bacon & eggs, because who has just eggs? I like a steak, but wrap it in bacon and it becomes a little piece of tender heaven. We even have the B.L.T. (the B does not stand for bread), and add bacon bits to salad (mmm...Caesar Salad). But what is bacon, and why all the hype about it suddenly?

      Bacon is a special product that comes from a "wonderful, magical animal" (Simpson, Homer) and I think there has always been hype about bacon. However, I have noticed there are more bacon novelty items on the market then there used to be. I love Bacon and chocolate, but I'm not sure how I feel about bacon beverages, like Maple Bacon Ale, or bacon bandages (probably not flavoured?). So, because of my love for bacon I decided to see how many items in one meal that I could add bacon to. The answer was 3, I could have added it to more items, but I then I got to thinking about my heart, and despite how much I love bacon, I didn't think my heart would appreciate the bacon as much as my taste buds.

Bacon, Bacon, and More Bacon
Here was my menu


Appetizer: Bacon Wrapped Avocado

Entree: Bacon Wrapped Chicken Drumstick, with steamed garlic broccoli (I thought about doing bacon mashed potatoes, but decided that would be too heavy for the meal and went with something lighter).

Dessert: Candied Bacon


I cooked all the items together on a rack in the oven, and as they were finished, I took them out and kept them warm. You could do them each on a different pan and have them all ready at the same time.

So, here's how you do it

Bacon Wrapped Avocado

4-6 Strips of Bacon, cut in half
1 Avocado, peeled and cut into 8-12 wedges (it depends on how big your avocado is, and how much you want in each wrap)
1/4 to 1/3 Cup Brown Sugar (depending on how sweet you'd like it)
1 Teaspoon Chili Powder (or less depending on how spicy you'd like it)


1. Heat the oven to 425°F (I baked them at 400°F).

2. In a small bowl, mix together the brown sugar and chili powder. Set aside

3. Line a baking pan with tinfoil and place a roasting rack on top.


4. Cut open the avocado and remove the pit. Slice lengthwise through the avocado, approximately 8-12 slices.

5. Wrap each piece of cut bacon around the avocado wedge. Roll in the brown sugar/chili mixture and place on the baking rack.

6. Bake for 10-20 minutes. Remove from the oven to a platter and stick a tooth pick in each for serving.


Bacon Wrapped Chicken Drumstick

1/2 a lemon, juiced
2 garlic cloves, crushed
   chicken seasoning (I used thyme and oregano)
6 chicken drumsticks
6 pieces of bacon


1. Heat oven to 400°F.

2. Mix together the lemon juice and garlic with some seasoning. Set aside.

3. Prick the chicken several times with a sharp knife and drizzle with half the garlicky lemon juice.

4. Wrap each drumstick with one piece of bacon and put in a single layer on the rack on your baking pan.

5. Drizzle on the remaining garlic-lemon juice.

6. Cook for 45-50 mins until the chicken is cooked through and the bacon is starting to crisp up. Flash under a hot grill if you like your bacon really crisp.


Candied Bacon

6 slices bacon
Finely ground black pepper
1/4 cup light brown sugar


1. Preheat the oven to 325 °F (I baked them at 400°F and they were fine, I just baked them for a shorter time)

2. Put bacon slices in a bowl, season them with pepper and toss with the brown sugar. Cover a baking sheet with parchment or foil with a roasting rack on top. Arrange the bacon in a single layer and sprinkle any sugar left in the bowl over the bacon. If you want, you can top with another layer of parchment or foil and top it, squarely, with another baking sheet that will flatten the bacon as it cooks, but I didn't have a problem.

3. Place the tray in the center of the oven and bake for 20 minutes. Check the bacon, and if it is not golden brown and fairly crispy, cook it for 10 to 15 minutes longer. Check it again. Keep in mind that when you remove the tray and transfer the bacon to a serving platter or individual plates, the bacon will "crisp" up a little more.

4. Let cool before serving.


      Cooking bacon in the oven on a roasting rack elevates it from the grease that drips out, but careful, it dries out a little faster, but it isn't being fried in fat. We also greatly enjoy baking a bacon weave. It's perfect for B.L.T.s because every bite can have bacon. To do this, cut 6 pieces of bacon in half, and basket weave them into 2 squares.

"Is it Bacon Day?" (Simpson, Homer)


                                                                                                                                                       Enjoy!
                                                                                                                                                           Mel

 P.S. It's not yet Bacon Day, you'll have to wait until August 31, 2013 for that!


Thanks to The Royal Bacon Society for the quotes.

Saturday 4 May 2013

Real Canadian Chicken

           We're a little chicken over here in the Peppery Pig household. Not scared or nervous, but full of poultry. Mr. Pepper loves to have leftover chicken on hand, which is why I feel like we're always eating chicken, be it for lunch or for dinner (and as I type I have chicken in the oven). Sometimes we'll roast a full chicken in the oven (once our barbecues reopen, we will resume roasting our beer-butt chickens on the grill), sometimes we do thighs, sometimes drumsticks, sometimes breasts. We base our decision about what part of the bird we'll eat on our weekly needs/menu. When roasting a whole chicken, we'll each eat about a quarter of the bird, leaving the remainder for sandwiches/wraps/salads for lunch. When doing breasts, thighs or drumsticks, we'll double what we need for dinner so we can have leftovers for lunch with sides the next day.

           However, because we eat so much chicken, I was finding that I was getting so bored of having the same old thing, so I began hunting for new and unique recipes that would change up the flavours. Now, don't get me wrong, I still love shake-n-bake drumsticks, and BBQ chicken thighs, but sometimes, you just need to spice things up. It really makes you appreciate those delicate flavours found in that box of shake-n-bake (ha). I should also mention here that I am working really hard to avoid processed/boxed foods and spice mixes because they are full of sodium and unpronounceable ingredients (I probably shouldn't mention that those are Jane's chicken strips in the oven? Don't judge, they were in the freezer). I digress, on my hunt to find new and exciting flavours, I stumbled across the one I am about to share. This recipe is unique because it combines some ingredients that one wouldn't necessarily think to use together. I call it Real Canadian Chicken because of its use of real Maple Syrup. It's a sweet, tangy chicken that is fantastic in a sandwich/wrap the next day with some avocado. It's an easy recipe to whip up ahead of time, and  best of all, it can all be done in one dish (if you'd like).

Here's what you need:
Mustard Seeds soaked in Whiskey
1/4 cup pure maple syrup
3 tbsp grainy Dijon mustard (I used a combination of Kozlik's 'Triple Crunch au Rye Triple Sec' and French's Prepared Dijon with Chardonnay)
2 tbsp minced fresh dill (or 2 tsp dried)
2 tbsp fresh squeezed lemon juice
1 tbsp olive oil
1 tbsp balsamic vinegar
2 tsp grated lemon zest (zest your lemon before you squeeze it)
1 tsp minced garlic (about 2 cloves)
1/4 tsp salt
1/4 tsp fresh ground black pepper
4 boneless, skinless chicken breasts (about 1 1/2 lbs)

Here's what you do:
Marinade


1. Whisk together maple syrup, mustard, dill, lemon juice, olive oil, balsamic vinegar, zest, garlic, salt and pepper in a small bowl or in a casserole dish that is just large enough to hold your 4 chicken breasts so they aren't overlapping.  You don't want one that's too big because your marinade will spread too thin and will most likely burn in the oven.


2. Arrange the chicken in the casserole dish and pour the marinade over the chicken. Flip the chicken to coat both sides. (If you mixed the marinade in your casserole dish, just be sure to coat the chicken well.)

3. Cover with plastic wrap or a lid and refrigerate for at least 1 hour, or up to 1 day.


4. Preheat oven to 350°F. Remove plastic wrap/lid and transfer casserole dish to the middle oven rack. Bake, uncovered, for about 35 minutes, or until chicken is no longer pink in the centre.


5. Place cooked chicken on a serving platter and keep warm. Pour juices and marinade from the casserole dish into a small saucepan. Bring to a boil over high heat until mixture reduces by half. Pour sauce over chicken and serve immediately.


       This is such a good recipe, and it makes enough marinade that if you want to add 2 more chicken breasts to the dish, you can without having to alter the ingredients, you just won't have as much marinade left to turn into the sauce. When we made our wraps/sandwiches the next day, I used the sauce as a spread on the bread. It was delicious. The other nice thing about this recipe is that you can alter it to fit your family's likes/dislikes. Don't like sweet meats? Don't add as much maple syrup. Not a fan of Dijon? Add less or combine different mustards (I'm not a fan, hence the combination). Have fun with the recipe.

                                                                                                                                                     Enjoy!
                                                                                                                                                         Mel

Makes 4 servings
per serving: 289 Calories, 6.4g total fat (1.1g sat fat), 40g protein, 16g carbohydrate, 0.4g fiber, 99mg cholesterol, 322mg sodium

Tuesday 9 April 2013

Stuff a Pepper in it....

      People know how to stuff turkeys and their faces, but most forget that you can stuff other items as well. I've stuffed pork chops (so delicious), chicken (like a turkey right?), and peppers (full of meaty tomato-ness).

       I can understand the apprehension that faces people when the prospect of stuffing something is presented to them. It appears to be a time consuming task, and that ever present fear of "what happens if it bursts? falls over? splits? doesn't taste good?". Stuffed foods can seem fancy and may seem like something that is outside of your skill set, but it doesn't have to be. This is, by far, the easiest stuffed pepper recipe ever. When I was looking for a good recipe, I found some with about 17 steps where you had to blanch the peppers and line them in such a way that you would burn your hands. I wasn't looking for a recipe where injury was certain (I like to keep it a surprise).

So, here's what you need:
1 lbs ground beef or pork (I used pork)
1/2 cup uncooked long grain white rice (I used brown)
1 cup water
6 green bell peppers - Make sure you choose ones that are stable when set on their 'lobes'
2 - 8oz cans tomato sauce
1 tbsp Worcestershire sauce
1 clove garlic
1 small onion
salt and pepper to taste
1 tsp Italian seasoning (equal parts basil, marjoram, oregano, rosemary, thyme)
slices of Mozzarella cheese


1. Start by preheating your oven to 350°F.

2. Place the rice and water in a saucepan and bring to a boil. Reduce heat, cover, and cook 20 minutes (or just make rice in rice cooker according to instructions)

3. In a skillet over medium heat, cook the meat until evenly browned.

4. Cut off the tops of the peppers and discard the seed, stem and membrane. Cut up the top and toss in with the meat. Arrange peppers in a baking dish with the hollowed sides facing upward.

5. In a bowl, mix the browned meat, cooked rice, 1 can of tomato sauce, Worcestershire sauce, garlic, onion, salt, and pepper. Spoon an equal amount of the mixture into each hollowed pepper.


6. Mix the remaining tomato sauce and Italian seasonings in a bowl and pour over the stuffed peppers.

7. Bake for 1 hour in the preheated oven, basting with sauce every 15 minutes, until the peppers are tender.


8. Arrange mozzarella slices over cooked stuffed peppers and return to oven to melt.


           This is a great recipe because you could do all the prep work earlier in the day, stuff the peppers and have them ready to toss in the oven as your guests arrive. You'll have them all fooled that you've been slaving in the kitchen all day to prepare such an exquisite meal.

          You could try different combinations of cheeses, herbs, sauces. One unique stuffed pepper I saw was to use roast beef (in place of ground meat), BBQ sauce, and provolone cheese to make a phili-cheese steak pepper. I might try that one next.


Enjoy!
Mel


Wednesday 20 March 2013

Not Your Average Rabbit-Food

   Welcome Back! Okay, I know, technically it was me that was missing but the world has been so busy lately.

       It's a new year, with new goals and exciting events so healthy living has become a priority. It's been difficult while working at a bakery, not just for me but for Mr. Pepper too. He finally had to tell me to "stop" because he didn't "need a treat every day". I didn't realize I was spoiling him, nor did I think he'd ever complain about being the recipient of brownies, cupcakes, and tarts. I digress, we are now on a healthy kick because have a few weddings to attend (including our own) where we must look our best. We are also competing in the Tough Mudder in May with a group of friends from University. Yes, I think we are a little crazy too, but what sounds like more fun than running 10 miles while completing 25 various military style obstacles with a group of nutty Brock Grads? So, to help us stay in tip-top shape and lose some of those pesky pounds and inches, we've instituted a meat-free day. Mr. Pepper thought it would be hard, but he agrees that the hardest part is finding new recipes to try (we don't want to feel like we're rabbits).

          Here is one of our favourite recipes, and by making a few alterations you could eat it every week and not recognize it's the same dish.

Veggie Medley
 12 mini red potatoes, unpeeled and quartered
3 cups medium-sized mushrooms
2 medium carrots, peeled and coarsely chopped
2 medium zucchini, cut into bite-size chunks
1 medium red onion, sliced
1 large red pepper, cut into bite-size chunks
1 large yellow pepper, cut into bite-size chunks
2 cups green beans, cut into bite-size chunks
2 cloves garlic, minced
1 tbsp olive oil
1 tbsp fresh rosemary, or 1 tsp dried
1 tbsp fresh oregano, or 1 tsp dried
1 tbsp balsamic vinegar
1/4 tsp salt and ground black pepper
1/2 cup light feta cheese, crumbled


1. Lightly grease a large roasting pan or pyrex dish with butter, oil, or cooking spray.


2. Add vegetables, garlic, oil and herbs. Mix well.


3. Roast uncovered at 425°F for 30 minutes stirring once or twice during cooking time.

4. Turn on broiler and broil vegetables for about 5 minutes, until the edges start to brown.


5. Remove vegetables from oven and transfer to a serving bowl. Toss with vinegar, salt and pepper. Sprinkle crumbled feta over top. Serve warm

To change it up add some different vegetables. We've had it with green peppers and broccoli, and have taken out the mushrooms. I'm sure it would be good with sweet potatoes, eggplant, tomatoes, corn, asparagus, or any vegetable you want to add. I also purchased Goat Feta (much to Mr. Pepper's dismay) which has a much stronger flavour than regular Sheep Feta, so I've even made it without the Feta. Trying different vinegar would also change the flavour. I can't wait to try this recipe in the grill basket on the BBQ come summer.

Bon Appetite!
Mel


Wednesday 23 January 2013

Cheese, Peas, Prosciutto...Oh My!

              Pasta and cheese just seem to go together like two peas in a pod. However, you don't always want, or need, to get that cheesy pasta fix from a blue box (seriously, is it just me or is that little blue box with only 1.5 servings getting more and more expensive?). Why not make a homemade mac and cheese, or dare I say, mac and 4 cheese? The pasta cheese pea pod is only made a little cozier by tossing in some actual peas and delicious prosciutto.

Here's what you need

4 tbsp unsalted butter
1 1/2 cup milk or cream
1 tbsp sea salt
1 box of Farfalle (bow tie) pasta
2 egg yolks
1/2 cup freshly grated Parmesan cheese
1/4 cup grated Asiago cheese
1/4 cup grated Havarti or Fontina cheese
1/4 cup grated Mozzarella cheese
1 package Prosciutto, diced
1 cup green peas (frozen or fresh, but not canned)
1/2 tsp Black Pepper


* Prep all your ingredients before you start*


1. Fill a large pot with water, add a teaspoon of salt and bring to a boil.

2. Cook pasta for the appropriate length of time for 'al dente' (take a look at the box).


3. Saute the butter in a large frying pan (at least a 12").


4. Add the milk/cream.


5. Once the cream is heated add a few tablespoons to your egg yolks and whisk. This will temper your eggs. If you don't do this then you will scramble your eggs when you add them to the pasta.


6. Drain the pasta when it's finished cooking. and add it to the cream/butter mixture.


7. Add the tempered egg yolks, all cheeses, and the pepper. Stir well.


8. Add the prosciutto and the peas stirring well after each addition.


9. Cook and stir for a few minutes until all the pasta is coated in a nice gooey cheese mixture.


            This makes a lot of pasta, about 6-8 servings, so be prepared for leftovers or to feed everyone you know. We do find that it improves as the week goes on though. You could mix and match cheeses, asiago is a little sharp, so I found that the Havarti softens the flavour (and I couldn't find Fontina in the grocery store).

                                                                                                                                    Enjoy!
                                                                                                                                          Mel


Thursday 10 January 2013

Lock Out is over!

        My Friends!  I apologize for my absence. As one can imagine, Christmas time is a very busy time of year in the bakery business. So much has happened over the last month and a half. I've discovered so many recipes (some that I can share, and some that I cannot) and have even eaten some amazing food.


      As you may know, my brother is a chef at a high end restaurant downtown, and Mr. Pepper and I decided to head over there for dinner tonight. Unfortunately, my brother had the night off, so he communicated to us via text message throughout our meal. We went to Jump with one specific item in mind: The Lock Out burger. Tonight was the last night it was being offered as the NHL and NHLPA had reached an agreement. It is a fantastic burger with an equally fantastic message: as fans, we love meat and even though we love hockey, we can still go out and have a good time without it. This specialty burger was only available as long as the lockout was on, and was offered at half price whenever a Leafs home game was scheduled.


From the Toronto Star,
For $10.75, half off the regular price, fans looking for 10 ounces worth of comfort can try the Lockout Burger - a short rib and beef patty topped with aged 7-year-old cheddar and homemade dill pickle relish. It comes with a side of fries and truffle mayonnaise to dip them in.


       It really was a delicious burger, the homemade dill pickle relish being my favourite part. The bun was super fresh and the lettuce and tomato were crisp. The burger was like a typical homemade burger in that it was juicy and flavourful, not greasy. It was almost round instead of patty shaped, and although this adds to the authenticity of it, it makes it difficult for the bun and toppings to stay where you want.  The truffle mayonnaise was very light and although I added some to my burger, the flavour wasn't strong enough to shine through.  Overall, the meal was delicious, and if it ends up on their regular menu, I highly recommend trying it.


       In Toronto it pays to know people. I am not one to name drop. I've worked with many people over the years who have little difficulty with the "do you know who I am?" and "Oh, I know so-and-so" parts of conversation. I am not like that. I am more likely to hint that I know someone, rather than just come out and say it. (For example, the waitress asked if I wanted regular fries, onion rings, or sweet potato fries with my dinner, and I responded with "He didn't tell me which to get", which obviously got a strange look from the waitress). When I finally got the courage to ask one of the wait assistants if she knew my brother, we had already been served our meal, and I only asked because my brother told me to (did I mention that he's younger than me?). She knew him, of course (he's a pretty cool guy).


        Well, I guess news travels fast because when our waitress returned, she was happy to hear that I was his sister and brought us spoons. Lucky for us, this meant that we got a dessert! The wait assistant was very friendly and although she couldn't remember everything that was on the plate, we got the gist of it. Here we have a chocolate tart with a candied orange peel and lingonberry compote. We aren't sure what the white dollop is, but it was orangey and creamy. The whole dish as a whole was delicious. On it's own, the tart was very rich, but having some of the orange cream stuff, or the lingonberry compote with it definitely softened it out.


           Jump might not be a place you visit on a daily basis (although if you follow my brother on Instagram you would be tempted), but it is definitely worth the time and money for special occasions. Someday I hope they bring back their duck confit poutine, then I would be there weekly!

                                                                                                                               Enjoy!
                                                                                                                                    Mel