Thursday 30 June 2016

Oatmeal


Breakfast, we all know it's the most important meal of the day, yet so many people skip it or grab something on the go. It can be difficult to eat properly when you wake up late or when you have to hustle a group of people out of the house. But should it be difficult? Should it be unhealthy? So many cereals are laden with sugar and sodium and who knows what else, yet this is how many people who do eat breakfast, start their day. One would think that because it's considered the most important meal of the day (studies have shown that children who eat breakfast perform better in school) we would take the time to make sure it's nutritious and properly filling.

Oatmeal is the perfect breakfast. 1/3 cup is equal to 120 calories, but these are not empty calories like many other cereals that wear off quickly. There is no sodium (other than what you add), no sugar (other than what you add), you can control the amount of extra calories added (yogurt, milk, nuts, etc), and oatmeal keeps you filling full longer than many other breakfast foods. Oatmeal is the perfect breakfast!

This is my go-to Oatmeal recipe. The Little Man loves his oatmeal, and he has it pretty much every morning. It's full of nutrients and helps give him the energy he needs to start the day. I try to change it up daily so he doesn't get bored of it, because seriously, who wants to eat the same thing every single day. I've included some combinations that we've tried, and some that we haven't yet. As we try them, I will update the post. What other combinations have you tried?

Oatmeal - Makes 1 1/3 cups

1 1/2 cups water (You can substitute some of the water for fruit juice. I often use a 1 cup water, 1/2 cup apple juice.
2/3 cups quick rolled oats (not instant, not steel cut)
1/2 tsp vanilla
pinch of salt (optional, I never add it)

1. Pour water and vanilla (and salt) into a small saucepan. Bring to boil.
2. Slowly add oats. Bring to boil, reduce heat and simmer for 3-5 minutes uncovered.
3. Remove from heat, cover, and let sit for 1 minute.
4. Serve and enjoy!

If you would like to make all the oatmeal the same flavour you can add your additives when you add the oats, or you can add them after. I often make it plain, then add the goodies after, that way I can change it up day to day for the Little Man.

Fruit Oatmeals

Apple Goodness


Apple Goodness: chopped apples + raisins + applesauce + yogurt + cinnamon


Berry Bonanza: any combination or berries, fresh, frozen, or dried (strawberries, blackberries, cherries, raspberries, cranberries, etc.)


Blueberry Muffin


Blueberry Muffin: fresh or frozen blueberries + lemon zest + maple flavour or maple syrup


Carrot Cake


Carrot Cake: shredded or finely chopped carrot + raisins + cinnamon + nutmeg + cream cheese


Cranapple Pie


Cranapple pie: dried cranberries + apple + applesauce


Cranberry Orange: dried cranberries + oranges

Peaches and Cream


Peaches 'n Cream: fresh or frozen peaches (I use 2 puree cubes and 1 peach slice) + cinnamon + yogurt


Pina Colada


Pina Colada: pineapple + shredded coconut + coconut milk/cream - This one is probably my favourite.


Poached Pear


Poached Pear: steamed or canned pears (I use fresh steamed pears and 1 pear puree cube) + nutmeg + allspice


Strawberries 'n Cream


Strawberries 'n Cream: fresh or frozen strawberries + yogurt


Strawberry Banana: strawberries + banana + yogurt


Tropical Delight


Tropical Delight: mango + pineapple + banana + shaved coconut
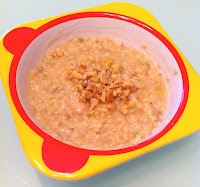


Nut Oatmeals
Banana Nut Bread


Banana Nut Bread: mashed banana + walnuts


Cherry Almond: cherries (Fresh/frozen/dried) + chopped/sliced/ground almonds


Date Square


Date square: coconut + steamed dates + apple + cinnamon + cashews + honey* + applesauce


Elvis: peanut butter + banana + bacon 

Gilgamesh: pistachios + steamed dates + cardamom (or cinnamon) + drizzle of honey + milk or yogurt

Honey Nut: chopped walnuts + drizzle of honey*

PB&J: peanut butter + fresh cooked strawberries/raspberries or jam

Peanut butter and Banana: Peanut butter + banana + touch of milk - the PB makes it really thick)


Pumpkin Pie


Pumpkin Pie: pumpkin puree + ground almonds + pumpkin pie spice** + yogurt


Raspberry Hazelnut: raspberries + chopped hazelnuts + cinnamon + yogurt

Chocolate Oatmeals
Chocolate Raspberry: chocolate chips + raspberries + yogurt

Hot Chocolate: hot chocolate powder

Other
Classic: raisins + brown sugar + milk

Gingerbread: cinnamon + cloves + ginger + allspice + molasses + brown sugar

Eggnog: rum extract + cinnamon + nutmeg + yogurt


You can add any yogurt or any milk to any of these. You also control the amount of spice and flavour in each. You can also make your own combinations. 

What combinations have you tried? As we try new combinations I will post them along with photos.


*Remember, children below the age of 12 months should not have honey.
**To make pumpkin pie spice:  combine 3 tbsp ground cinnamon, 2 tsp ground ginger, 2 tsp nutmeg, 1½ tsp ground allspice, 1½ ground cloves

Sunday 8 May 2016

Kangaroo Snacks

Kangaroo snacks are snacks that can be put into a handy pouch and easily consumed without a spoon. They are great for feeding baby in restaurant and in the car, among many other places. But they aren't just for children. These heavy duty pouches are great for feeding adults too. These pouches are handy and nutritious and they are super easy to bring in the car or on a hike because they aren't bulky and there is little to no waste. Of course, the ones in the grocery store aren't quite geared for adults, and surprise surprise, the grocery store pouches are full of sugar, chemicals, and who knows that else.

There was recently a recall on one brand of squeeze pouch, and it isn't the first time it has happened. In some homes, the child has direct access to these snacks and is allowed to have them whenever they'd like, it would be horrifying to see that my child (or me for that matter) has been ingesting mould.

So, how best to combat the issue of knowing what's in your pouches? Make them yourself! Then you know what is in the product, when it was made, and when it is best before. You don't have to question how long it's been sitting on the shelf or if the packaging/equipment used in processing has been properly cleaned and sanitized. Oh, and it's cheaper to make them yourself.

First, lets start with the pouches themselves. There are many different styles available: ones that zip at the top, ones that zip at the bottom, ones that stand up, ones that don't, ones with spouts at the top, ones with spouts out the side, ones with square corners, ones with rounded corners, ones with double zippers, ones with single zippers, ones that are clear, ones that have windows, ones that are opaque, ones that are dishwasher-safe, and ones that are hand-wash only. You'll also need to decide what size you want, some are huge (+9oz), some are tiny (4-5oz), others are in between. Most grocery store pouches are 4-5oz.  Once you've narrowed down what features you'd like, it's time to go shopping.

This one holds 9oz; a little too
much for little hands.


Keep in mind, the ones that zip at the top have the spout at the side and often are able to stand up independently to fill. I was concerned with the many crevices that food could get trapped in with this model. It also seems a little awkward to hold on to and eat from. I assume you'd eat it while holding on to it flute-style… but I figured that would be awkward for little hands that are just learning to eat.


Healthy Planet Solutions is a
Canadian company!
Ones that fill at the bottom often have the spout at the top (but not always), and must be placed upside down in a glass to fill. There were many reasons we went with this model (which we purchased from Amazon.ca). First, we liked that it was dishwasher safe and the water flowed right through. This made us think that there would be little chance of food getting caught or stuck in the corners or the spout, and so far, we haven't had any issues. Second, we liked the size, they hold 6oz, which is more than the tiny grocery store pouches, but less than the jumbo ones above. If we want to put less, we can, if we want to put more, we can do a second pouch. Third, we liked that it was mostly see-through so you can clearly see what's in each pouch, although there is also space on the back to write the contents and date made. The zipper on the pouch is also fantastic, in fact, it's downright difficult to open. I would much prefer this rather than it being an easy to open zipper that the Little Man could open and make a big mess with.

All I see is dishes and clutter.

There are also some very fancy contraptions or gadgets that fill the pouches for you. This just seemed excessive and looked like it would amount to a lot of dishes and extra stuff cluttering up our tiny kitchen. In concept, it's a good idea, and I know someone who has one of these apparatuses and loves it, but I think, depending on the type of pouch you buy, you can easily do it yourself. Infantino's Squeeze Station (the one pictured to the left) is just one example of these types of machines and fills disposable pouches, although you can buy a reusable silicone one from their website. Babies R Us sells the 50 disposable pouches with 25 caps (I just find this funny, because what are you likely to lose, or accidentally toss out?).


What can you put in the pouches?  Yogurt, applesauce, purée, sauces, the options are almost limitless, although anything chunky will get caught in the spout.

What type of pouches have you tried? Store bought or homemade?

Stay tuned for some pouch filling ideas in the future.

The images belong to the respective link holders.

Saturday 2 April 2016

Pass the Polenta Please


Polenta, Broccoli, and BBQ chicken (recipe to follow)
Polenta. It's something I've seen in magazines but by just looking at it, I couldn't really tell what exactly polenta was. Fast-forward to cooking for a 14-month old who no longer wants to be fed by Mom and Dad, but wants to eat his entire dinner himself (I guess soup's off the menu for now). This recipe is great because it can be eaten hot, warm, or cold. You can make the pieces as big or as small as you'd like. You can also add different spices to change the flavour to better coordinate with dish you are serving with it. I also like it because it's easy to make, and it's a very inexpensive side dish that uses ingredients that I already had at home.  If you have older children at home, they can also help to make it!

Ingredients
½ cup cold water
½ cup yellow cornmeal
1cup water
¼ teaspoon salt
1 tablespoon butter
3 tablespoons freshly grated parmesan cheese
1 tablespoon olive oil

Lightly grease a 9x9 inch baking pan or dish. 


Stir cornmeal and ½ cup cold water in a medium bowl until blended to a thick paste.


In a large saucepan, bring 1cup water and the salt to a boil. Stir in the cornmeal paste and return to a boil, stirring frequently.

Reduce the heat to low and cook, stirring occasionally, until the polenta thickens enough to hold the trail of a spoon, 5 to 10 minutes. (It should resemble soft mashed potatoes.)

Remove polenta from heat and add the butter and 2 tablespoons of Parmesan, stirring until the butter is melted.


Working quickly, pour the polenta into the prepared baking pan and spread it evenly with a spatula. Sprinkle the top with the remaining Parmesan.


Let it cool, then cover pan and refrigerate for at least 1 hour, or until the polenta is chilled through and firm.


Heat oven to 400 degrees. 

Press small cookie cutters into the pan of chilled polenta to cut out shapes.  Or, use a knife to cut bars/strips. Use spatula to transfer the shapes to a lightly oiled nonstick baking pan. 

With a pastry or basting brush, paint the top and sides of each shape with the olive oil. 


Bake for 15 to 20 minutes, or until the polenta shapes are lightly browned, crispy around the edges, and soft inside. Serve warm.


My initial recipe said to use shapes which I did try once, but I found that there was too much waste and the Little Man doesn’t really care what shape his food is right now. Once he’s older, fun shapes might be appreciated more, but for now, polenta bars are what we serve.

You can get your children involved in this recipe too. Let them help to measure out the polenta (tip: put the measuring cup on a cookie sheet to catch the spill over and reduce waste), have them help to sprinkle the Parmesan cheese, let them use cookie cutters to cut out the shapes.  Children who spend time in the kitchen and help cook are less likely to be picky eaters, and will be more aware of how to pick healthy choices.


You can dip the polenta into anything really, marinara or pizza sauce is our favourite. You can also change up the flavour by adding different herbs when you’re cooking it. What flavours have you tried?


Tuesday 1 March 2016

Mmm-Mmm-Muffins

When feeding babies, toddlers, kids and adults, it's important to be aware of how much sugar is in the food being consumed.  So many snacks designed for children have sugar and sweeteners added to them. Manufacturers have become clever when listing ingredients on food labels, so it's up to us, as the consumer to be knowledgeable enough to see what kind of sugar is being added to our foods. According to Prevention.com, there are 57 Names of Sugar.  But, are all sugars bad? No way! By reading the labels of the foods you eat and serve you then become a responsible consumer. Another way to avoid added sugars, is to make your own snacks.

These muffins are naturally sweet and are packed with essential nutrients. Even better, is that you have control over the flavour.

These muffins were designed with babies and toddlers in mind, but they are so good that you could double the recipe and make adult sized muffins too.

Mmm-mmm-Muffins
Makes 24 one-bite muffins

¾ cups flour
½ cup quick oats
1 tsp cinnamon
½ tsp baking powder
¼ tsp baking soda
⅛ tsp salt

⅔ cup mashed overripe banana (about 1½ bananas)
¼ cup unsweetened applesauce
¼ cup milk
1 tbsp lemon juice
1 tsp vanilla

Plus up to 2 of the following
¼ cup grated carrot
¼ cup grated apple (squeeze out juice)
¼ cup grated zucchini (squeeze out water)
¼ cup raisins (chopped)
¼ cup dried cranberries, cherries, apricots, or other fruit (chopped)
½ cup blueberries (halved or quartered)
½ cup chopped walnuts
 

Preheat oven to 350°F.


Grease muffin pan with butter or non-stick spray.

Combine all dry ingredients.

Mash banana and stir in applesauce, milk, lemon juice and vanilla.


Fold in 2 extra ingredients. I did ¼ cup of carrot, ⅛ cup apple, and ⅛ cup raisins. In the past I’ve done apples and dried cherries, and apples and raisins.


Bake for 15 – 20 minutes. It really depends on how watery your bananas, applesauce and add-in fruit is. If you’re using a lot of moist fruits, it will take longer, if you are using more dried items it will take less time. It’s okay if they are a little gooey inside; there is no egg, so there is no risk of salmonella. Careful not to over-bake them though, you don’t want them turning out tough and chewy.


Let cool for 5 minutes in the pan, then remove and place on wire rack to cool completely.

Mmm-Mmm-Muffins with poached nutmeg pears


I toss them in the freezer and take them out when needed. Two one-bite muffins are equal to a ¼ cup. I usually serve them as a snack with a side of fruit.


The joy of this recipe is that the possibilities are endless. If you, or baby, are lactose-free, you can use almond, soy, coconut, or whatever milk-substitute you want. If you’re gluten-free, go ahead and use your regular gluten-free flour (I prefer Bob’s Red Mill All Purpose Gluten Free Flour). Don’t be afraid to experiment with different add-ins.

Let me know what combinations you try!

Update: I've since tried Strawberry-Blackberry muffins too!