Monday 26 November 2012

Happy Birthday!

      Okay, so Miss Clarke, this is for you, because today is your birthday down in the little land of Kiwi's. I know the cake says "Layne" and "Kris", but you can ignore those. If you were here in TO, I would have made you one too.

         Back in October my brother asked for an ice cream cake for his birthday. We were celebrating it at Thanksgiving because that was the only time everyone would be together. Layne's birthday (my future Mother in Law), was right after Thanksgiving, so she also got her name on the cake. Unfortunately, my brother ended up having to work, so we enjoyed his birthday cake for him.

         Thanks for the back story, right? I know, here is the recipe.
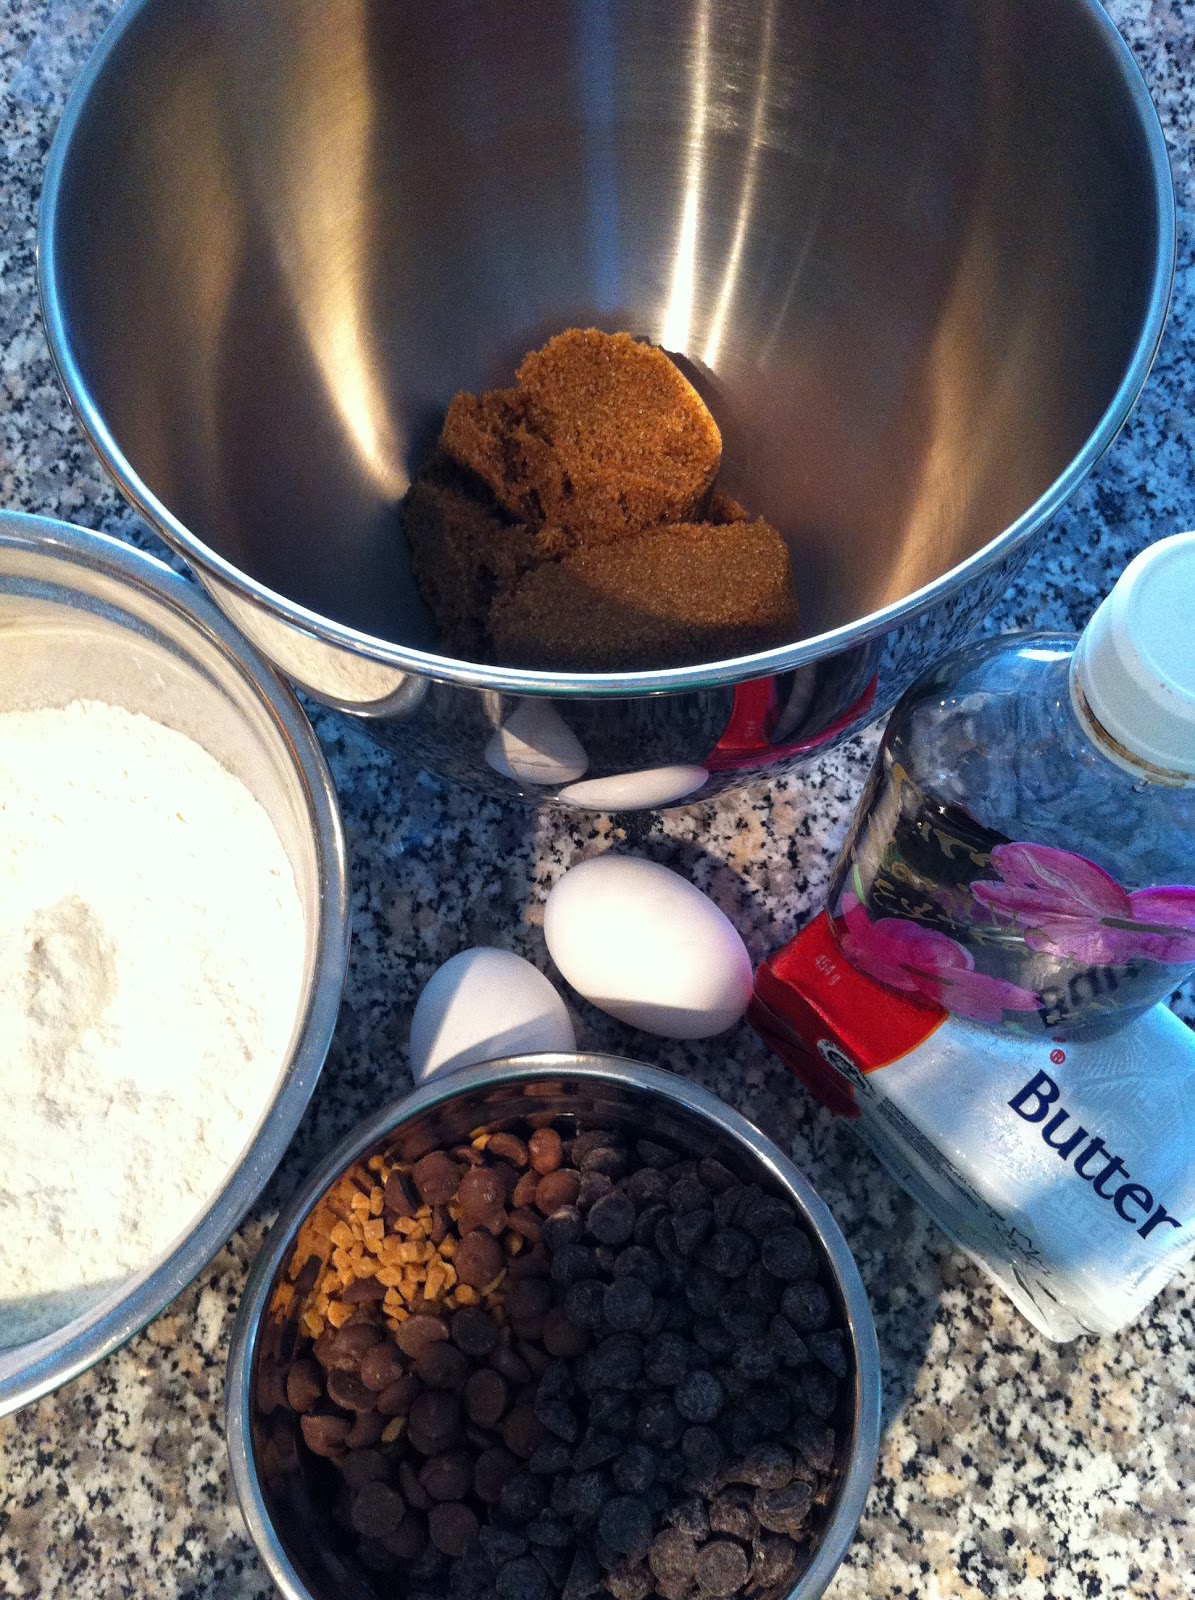
Supplies
Chocolate ice cream
Vanilla ice cream
Smucker's Magic Shell (or equivalent)
Oreo's (or equivalent)
Cool Whip - optional
Hot Fudge
Gel icing (for writing)
Spring-form pan
Parchment paper


Step 1: Make your homemade chocolate ice cream (recipe here)
  • Now, before you put the ice cream in a tub to freeze, cut a piece of parchment paper to fit a little wider than the bottom of your spring-form pan. Press it into the bottom of your closed pan, and press it against the edge so it kind of covers the small gap between the bottom and the sides (mine leaked a little when I put it in the freezer, and then it stuck to the metal bottom, parchment paper should fix this). 
  • Scoop your fresh ice cream into the pan, only going about a third of the way up. Make sure you scoop into the centre, then use an offset spatula to guide it to the edge (this will reduce the amount of ice cream you get on the top 2/3 of the pan).
  • Put it into the freezer.

Step 2: Hot fudge layer
  • Once your chocolate ice cream is frozen, it's time to start on the next layer.
  • Heat the fudge, but don't make it too hot, you don't want to melt the ice cream you pour it onto, just warm enough to make the chocolate fudge easy to pour. 
  • Pour it over the chocolate ice cream so you have a good layer.
  • Put it back into the freezer.


Step 3: Chocolate crunchies layer
  • Put about 2 rows of Oreo's into a plastic bag (I believe most bags have 3 rows). Using a heavy can or a rolling pin crush the cookies. You don't want them to be too fine, or it will become a paste, making cutting your cake near impossible. You want about 2.5 cups, and chunks are good, believe me. Transfer this mixture into a bowl.
  • Squirt your Magic Shell chocolate into the bowl of crushed Oreo's, just less than half the bottle (remember, you can add more, but you can't take it out). You want the cookie crumbs to be coated, but not turned into a paste.
  • Spread the cookie crumbs evenly over the chilled fudge layer. If you need to make more, make some more.
  • Put it back into the freezer.


Step 4: Make your homemade vanilla ice cream (recipe here)
  • Scoop your ice cream over the cookie crumb layer and smooth it out even with the top of the pan with an offset spatula.
  • Put it back in the freezer.

Step 5: Decorating (Optional)
  • Remove your cake from the freezer and from the spring form pan.
  • Without letting it thaw too much, spread Cool Whip evenly over the top and sides. For extra detail, you can pipe rosettes, stars, or shells (stay tuned for a post on proper piping and  terminology, once I learn it at work)
  • Freeze to solidify again.
  • Write your message using a gel icing writer. This should be done just prior to serving.

Step 6: Eating
  • Remove the cake from the freezer (and from the spring form pan if you didn't decorate). 
  • Let it sit out for about 10 minutes.
  • Using a warm knife, cut the cake and serve.
  • Eat the cake (it's delicious).


           Whether you make this for your birthday, for someone else's birthday, or just because you want a homemade version of the classic DQ cake (but better), this is the cake for you. Try experimenting with different flavour combinations. I think a homemade cookie would be fantastic in it too.


                                                                                                                                                    Enjoy!
                                                                                                                                                        Mel

Thursday 15 November 2012

Go Get Your Cheese On!

         If you take a walk around Toronto you will notice that a specific comfort food, that you often make when there is nothing else to eat, is becoming the current rage. I'm not sure if other cities are jumping in on this novelty treat, but regardless, this comfort food is being made more extravagant and upscale. Certainly the most posh restaurants in the country will begin selling this simple sandwich for ridiculous prices, and oddly, people will pay for. But for now, the lowly Grilled Cheese sandwich is content being a delicious dish served on side streets in the most trendy and bohemian of neighbourhoods.

The Details
         A few weeks back, Miss McCormack and I visited one of these fine trendy establishments in Kensington Market, and wow, were we amazed. We were first amazed by the sheer number of options. Each flavour combination seemed more adventurous than the last, and we quickly realized that our decision would not be an easy one. Secondly, we were amazed that they do everything fresh. If you want bacon, they cook it right there, on the spot. There are no heat lamps, no frills, just 2 guys grilling some cheese. After much deliberation, we finally decided to try two different sandwiches, then we could swap halves. Best decision ever!

Our Decisions


         The first sandwich we decided upon was the Blackjack. This sandwich was composed of jalapeño Havarti cheese perfectly melted with black olive pesto, spinach, and tomatoes between two pieces of fresh whole wheat bread. The olives gave the sandwich a nice tang and the jalapeño Havarti cheese gave it a nice kick. The sandwich was served with ruffled chips and a gigantic homemade pickle, all for $6.


         The second sandwich we tried was Apple Crisp. This sandwich was the perfect combination of savoury and sweet, and you even have the option for adding bacon (freshly cooked of course). Between two pieces of whole wheat bread we found gooey cheddar cheese, crispy-caramelized apples, red onion, and avocado (we decided to go meatless). Apples and cheese have always been a popular combination, and the guys at Grilled Cheese have certainly jumped on that. Just like all their sandwiches, it was served with ruffled chips and a gigantic pickle, all for $8.


Overall Thoughts
         Despite the long wait for our food (and we arrived before the lunch rush), the sandwiches were delicious and full of flavour. Although the wait for our meal was long, I really can't complain because I know that the cook uses fresh ingredients that are cooked to order. The only real disappointment was the chips that were served with the grilled cheese sandwiches. I feel that the store-bought potato chips really took away from the wholesomeness and experience of the food. The homemade pickle was a really nice touch though. Overall, I would highly recommend visiting this fine and trendy establishment.


Address & Hours
The Grilled Cheese
66 1/2 Nassau Street, Toronto, ON.


Monday - Thursday: 11:00 am - 10:00 pm
Friday - Saturday: 11:00 am - 12:00 pm
        Sunday:     11:00 am - 6:00 pm

If you're a TTC rider, take the Spadina streetcar (bus) and get off at Nassau. Walk west and cross Augusta Ave. You can't miss it. Just look for the long line!


Go get your cheese on!

                                                                                                                                                                                  Enjoy!
                                                                                                                                                                                       Mel

UPDATE: The Grilled Cheese has since shut down. I guess it doesn't matter how delicious your food is, you can still be a twit. For more information you can read this BlogTO post. 


Wednesday 7 November 2012

Butternut Squash-Sweet Potato-Coconut Soup

    Good evening friends! I apologize for not making any posts in the last week, but I've been a little busy. First news first, I got a job! I know, I can hear you all cheering. Thank you, thank you. It's at a small bakery out in Scarborough called Knead Bakery. They do breads, desserts, bars, cookies, cakes, and wholesale orders.  So far I have done one 'stage' (pronounced like portage, which is a try-out) and worked one full day. So, due to my new employment, I won't be posting on as frequent basis as I currently was and I won't be posting as many recipes for sweets; I will stick to more savoury ones for the time being.

        Moving on, today's recipe is delicious. Thank you Matt and Caitlin for this amazing recipe. It's cooked in a Crock-Pot (or slow-cooker), if you don't have one, go out and get one now, they are the best. Nothing is better than starting a meal in a slow-cooker, going out and and walking around all evening as a Zombie in the rain, then coming home to a piping hot bowl of soup.

Here's what you need:

1 butternut squash
1 large sweet potato
1 onion
1/4 cup butter
14 oz chicken stock (divided) - You could use water or vegetable stock
1 can coconut milk
salt and pepper to taste
chili powder to taste
cumin, curry, or turmeric to taste


1. Cut up the butternut squash into cubes and place in the slow-cooker.


2. Cut up the sweet potato into cubes and place in the slow-cooker.
 3. Dice the onion and put it in the slow-cooker with the butter (I cut mine into cubes and dropped them on top, you'll also notice some peppers. I threw those in because they were left over from tacos the night before).

4. Pour in 7 oz of the chicken stock. Cover, and no peeking!


5. Cook on HIGH for 4 hours.


 6. Once the four hours are up, use your hand blender and blend your soup. Add the rest of the stock, the can of coconut milk, and the spices. Blend again.


7. Cover and cook on HIGH for an additional 15 minutes. Ladle into bowls and garnish with chili powder and chives or minced jalapenos (both are tested and delicious!)


     You can play around with the spices and flavours. Depending on the squash and sweet potato you get, you might find the soup to be sweet, so playing around with the spices should help. Have fun with it!

                                                                                                                Enjoy!
                                                                                                                     Mel


Wednesday 31 October 2012

Pumpkin Crème Brûlée

HaPpY hAlLoWeEn (AgAiN) !!!!

        Since today is Halloween and everyone is wondering how to make tonight's dinner more special (okay, so the little ones don't need anything more to make today special, but I think adults might like a treat that is more substantial than the candy they snitch from the loot bags). Here's a treat you'll never forget, and it's so much easier than making a pie (that phrase "easy as pie" never really made sense to me because pie is quite challenging to make). In my previous post I mentioned that the cookies lacked the strong pumpkin flavour I was craving, so off I went to find a recipe that would include pumpkin and satisfy my desire. I love Crème Brûlée (especially my brother's Christmas Crème Brûlée), so why not Pumpkin flavoured? I've sampled Bailey's, Cranberry, Rhubarb, Vanilla, and Strawberry versions, so pumpkin seemed like a logical direction to go. This one is delicious, it really tastes just like a pumpkin pie, but without the crust.

Here's what you need:


The Players
3 egg yolks
1/2 cup brown sugar
1 cup heavy cream (I used half-and-half)
1 cup pumpkin puree
1/2 tsp. ground allspice
1/4 tsp. ground cinnamon
1/4 tsp. ground nutmeg
1 pinch salt
Boiled water
1/2 cup white sugar (reserved)


1. Preheat the oven to 325°F. and boil the kettle.


2. Whisk egg yolks and brown sugar together in a bowl.


3. Stir in heavy cream, pumpkin puree, spices and salt.


4. Divide pumpkin mixture between six ramekins, leaving about a 1/2 inch at the top. (Depending on the depth and size of your ramekins you might need to use more.)


5. Place the ramekins in a baking dish (I use my roasting pan), and fill the baking dish with the hot boiled water until it reaches about half way up the sides of the ramekins.


6. Bake in your preheated oven for about 30 to 35 minutes, until set. Remove the ramekins (put some elastics on the end of your tongs).


7. Refrigerate until completely cool, at least 2 hours.


8. Once cool, sprinkle about 1 tbsp of sugar onto each Crème Brûlée and spread it around until the top is entirely covered. Melt the sugar with a chef's torch until the sugar melts and is crisp and brown (about 1 to 2 minutes).


9. Allow to cool slightly, and serve. Garnish with a dollop of whipped cream if you wish.


      I can sense you asking some questions. Let me field some of them to help you out.

Q. What do you mean set?
    A. When a custard is set, it means it is cooked.

Q. How do I know when my Crème Brûlée is set?
    A. This one is a little tricky, but in general Crème Brûlée custard doesn't usually set during cooking, it sets as it cools. Refrigeration is typically required to get it to completely set.

Q. My oven is a little wonky with its temperature, how can I tell if they are ready to come out?
    A. The Better Homes and Gardens New Cook Book states that "to test the custards for doneness, insert the top of a table knife into the center of each custard. The knife will come out clean if the custards are fully cooked." I did not use this method, but I wish I had known about it when I made this recipe.

Q. There is a lot of liquid that seems to have separated out of the custard, what does that mean?
    A. It means that you over baked it.

Q. When I dig into my Crème Brûlée, I notice it's not smooth, why is that?
    A. I don't believe this one is supposed to be smooth. Pumpkin is clumpy and stringy, so I think it is supposed to be the consistency of cooked pumpkin pie filling.

Q. I don't have a chef's torch to make the sugar topping, should I skip that step?
    A. NO. It just won't be a Crème Brûlée without the crunchy sugary topping.

Q. What can I use to get the caramelized topping if I don't have a chef's torch?
    A. If you don't have a torch, simply put the sugar on the ramekins as instructed and place them on a baking sheet. Make sure the rack in the oven is all the way to the top closest to the broiler and turn on the broiler. Once the oven is preheated, put the baking sheet with the ramekins in on the top rack. Keep checking on the ramekins to see when they will be done, it is okay to continuously open the oven. Remove baking sheet and let it cool in the fridge before serving as the ramekins will be hot and Crème Brûlée is typically served cold.

          This is a good recipe because you can make it the day before (if you to make sure you plastic wrap the ramekins) and finalize it with the caramelized sugar just before serving.


                                                                                                                Enjoy!
                                                                                                                   Mel


Pumpkin Roll-Out Cookies

HAPPY HALLOWEEN!

       To celebrate the season, today is going to be a double post. We'll start off with some fun pumpkin cookies. What better way to get into the Halloween spirit then to make some ghoulishly delicious cookies? Now, In my own opinion, they were not pumpkin-y enough and tasted a little doughy, but I received rave reviews from many others for them, so despite my reservations I have decided to share the recipe. I will also include some tips that I think would make them a little tastier.

Here's what you'll need:

3/4 cup unsalted butter (always use unsalted butter when baking)
1/2 cup packed brown sugar
1 tablespoon orange zest (I only had lemon, so that's what I used)
1/2 cup solid pack pumpkin puree (I used pure pumpkin, from the can)
1 egg yolk
1 teaspoon vanilla extract
2 1/4 cups all-purpose flour
1/4 teaspoon ground cinnamon (Next time I would double this)
1/4 teaspoon ground ginger (Next time I would double this)
1/4 teaspoon ground nutmeg (I wouldn't double this, but I would add 1/4 ground allspice as well)
1 pinch salt (just a pinch is all you'll need)


1. In a medium bowl, cream together the butter, brown sugar, and orange zest. 

2. Stir in the pumpkin. 

3. Add the eggs and vanilla, mix well. 


4. Sift together the flour, cinnamon, ginger, nutmeg, allspice, and salt then stir it into the pumpkin mixture. 


5. Remove the dough from the bowl and roll into a log, cover with plastic wrap and place in the refrigerator. Chill dough for about 1 hour. (If you skip this step you'll be peeling dough off your counter, you need to chill the butter to make it pliable.)

6. Do all the dishes and scrub the surface you will be rolling the dough out on.

7. Preheat oven to 375°F.


8. On a lightly floured surface, roll out the dough to 1/4 inch thickness. When you are rolling it do a few pushes of the rolling pin, then give your dough a quarter turn and continue rolling. Continue doing this until your dough is the desired thickness.(Mine were about 1/8 inch thick, but I wish I had done them a little thicker).


9. Using your cookie cutters, cut into desired shapes and place onto a cookie sheet with parchment paper.


10.Bake for 10 to 12 minutes in the preheated oven. 


11. When you remove them from the oven let them cool about 2 minutes on the sheet, then move to a drying rack.


              Once the cookies are COMPLETELY cooled, you may ice them. You could use this recipe for Royal Icing, or this one for decorator's icing.

2 cups icing sugar
1 tsp. vanilla
2 tbsp + 1 tsp milk

1. Combine sugar, milk and vanilla and mix until smooth (add extra milk or icing sugar until the consistency you want is obtained)

2. Separate and add a couple drops of food colouring to tint your icing. 

3. Ice as desired.


Here are my iced cookies, I know, I know, I need to practice my icing skills.  The leaf cookie on the top left was a trial, which didn't quite work as planned as the different colours didn't fuse well when rolled together. However, all that I did was I separated some dough and dyed the it different colours before rolling it out and cutting it. 

Here's how I iced the rest:

The ghost and mummy are cream cheese frosted with gel detail for eyes. 

The pumpkin, skeletons and Frankenstein's monster are iced using only the tinted decorator's icing.

The eyeball has a base of cream cheese frosting, with red tinted decorator's icing drizzled over top. I then used a toothpick to drag the red around to make the veins. The iris is decorator's icing and the pupil is gel.

Finally, the spiderweb has a decorator's icing base and the gel is in 2 rings (outer and inner), then I used a toothpick to pull the gel from the inner ring out passed the outer ring.


I  only had Christmas cookie cutters, so for the ghost, I just pressed the legs together. The leaf was a traced paper and the dough was cut out using a knife.


Good Luck! Happy Halloween!

                                                                                                                              Enjoy!
                                                                                                                                  Mel


Thursday 25 October 2012

Lasagna Rolls

         Who wouldn't agree that food is more fun rolled up? Maybe a square.... but probably not.  Everyone loves burritos with all their meaty and cheesy goodness rolled into a tortilla. Kids love those sweet 'fruit' roll up snacks, although we all question how much 'fruit' is actually in them. Momma O and my aunts used to make jello roll ups, with, marshmallows and, you guessed it, jello! And, there are a tonne of different appetizers that are rolled up in tortillas or pastry dough. Rolling up your food just makes it scream, "I'm fun! Eat me!" What makes it even better is when it's healthy! Youpii!

       Today we'll be making Lasagna Roll. Now, just  a bit of a warning, these are meat-less, but I swear to you, no one will ever know. Mr. Pepper asked me multiple times if I was sure that there was no meat in them (really, I made them, I am positive!). These are good for all ages, and easily adaptable to your own likes-dislikes and dietary restrictions.

Here's what you need:

9 Lasagna noodles
10 oz (1 package) frozen chopped spinach
15 oz (1 tub) fat free ricotta cheese
1/2 cup grated Parmesan cheese
1 egg
salt and pepper to taste
32 oz tomato sauce
9 tbsp. partially skimmed mozzarella cheese, shredded


1. Preheat oven to 350°F.  Boil water in the kettle.


2. Layer your uncooked lasagna noodles on a baking sheet or in a 9" x 12" baking dish. Pour boiling water over top of the noodles, making sure all noodles are fully submerged. Set aside. (This is by far the easiest way to cook lasagna noodles, ever!)


3. Combine spinach (now, I only added half of the spinach as I misplaced the rest, only finding it once the entire dish was in the oven, and it still tasted great), Parmesan, egg, salt and pepper in a medium bowl.


4. Ladle about 1 cup of sauce (I had Ragu kicking around the fridge, so I used that) on the bottom of a 9" x 9" baking dish.

5. Remove your cooked lasagna noodles from hot water in the baking dish and pat dry.


6. Place a piece of wax paper on the counter and lay out all of the cooked lasagna noodles. Take about 1/3 cup of the ricotta-spinach mixture and spread evenly over each noodle, leave about 1cm at one end.


7. Once you are out of mixture, and all your noodles have some spread over it, roll them each up carefully towards the end where you left some space. Place them each seam side down into the baking dish.


8. Ladle the remaining sauce over the rolled noodles in the baking dish and top each roll with 1 tbsp. of mozzarella cheese.


9. Put foil over the baking dish and bake for 40 minutes. Remove foil and bake for an addition 10 minutes, or until melted cheese on top is bubbly. Let sit a few minutes before serving.


        Here's where it gets interesting! This recipe comes with nutritional information! I wish I could do this for all of my recipes, but alas, I don't know how.
6 WW+ points      224.9 Calories      5.1g fat      3.4g fibre      13.0g protein      31.5 carbohydrates

        You could make this recipe full fat by not using the partially skimmed and low fat cheeses, and you can even take out some of the carbs by using zucchini strips instead of noodles (make sure you salt the strips to draw out the moisture and then pat them dry before adding the ricotta-spinach mixture). You could even make it meat lover friendly by adding sausage, pepperoni, or ground beef/chicken/pork. Have fun with it!

                                                                                                       Enjoy!
                                                                                                            Mel


Tuesday 23 October 2012

Chocolate Chip Cookies

      My apologies friends, it has been a while since I posted last. I have eaten a tremendous amount of fantastic food over the last week, but alas, I don't always remember to take pictures (I often remember when I am part way through, or after I have finished eating it).

      Today, I will share Mr. Pepper's favourite cookie of all time. It's not his favourite recipe, but I am not releasing my mother's recipe online. I have a feeling she won't give it to me now that I've started blogging.

The players
     Here's what you need:

1 cup butter
1 1/2 cup brown sugar (packed)
2 large eggs
1 tsp. vanilla
2 cups all purpose flour
1/4 cup cornstarch
1 tsp. baking soda
3/4 tsp. salt
2 cups chocolate chips (I use a combination of toffee bits, dark chocolate and milk chocolate, leftover Easter chocolates work well too)

Mmm... Cookie Dough
1. Cream together butter and sugar in a large bowl. A hand or stand mixer makes this step super easy.

2. Add eggs, one at a time, beat well after each addition.

3. Add vanilla and beat until smooth.

4. In a separate bowl combine flour, cornstarch, baking soda and salt.

5. Turn your mixer to speed 1 (or low speed). Add half of the dry mixture to the butter mixture. Mix well until no dry flour remains. Add the remaining dry mixture and mix until no dry flour remains.

6. Add chocolate chips. Mix well. Depending on your mixer, you might need to do this using a spoon.
Before the Oven


7. Line a cookie sheet with parchment paper. Drop using 1 1/2 tbsp of dough for each cookie. Space them 2 inches apart (this gives them room to spread). If you are making a large cookie, drop them closer together, but make sure you leave a little bit of space in between each drop so it cooks all the way through. A solid sheet of dough doesn't always cook well.


In the Oven


8. Bake in a preheated 350°F oven for 10-15 minutes (until golden brown). Let them stand for 5 minutes on the cookie sheet before moving them to racks to cool.


Makes 3 dozen cookies.


                                                                                                  Enjoy!
                                                                                                      Mel
Cookie Time!


Tuesday 16 October 2012

Chocolate Ice Cream

         We've already gone through the basics of vanilla ice cream, now, to move on to the more challenging chocolate ice cream. Maybe chocolate ice cream isn't more difficult to make, actually, my chocolate recipe is easier to make than my vanilla. This recipe makes a super smooth and chocolate-y dessert, but without the cloying sweetness found in grocery store ice cream.

          Start by prepping your ice cream maker. My Kitchenaid ice cream maker needs to be frozen solid before you turn the mixture into ice cream, so I just pop it into the freezer the day before I start making the delicious mixture.

           Now that your ice cream bowl is on its way to be frozen, it's time to start the good stuff. Here's what you'll need:

2 cups half & half
1/3 cup unsweetened cocoa powder
1 1/2 tsp. vanilla
2 oz semisweet chocolate squares
4 large egg yolks
1/2 cup sugar


Cocoa powder and half & half
Here's what you'll need to do:


1.  Gradually whisk half & half and cocoa powder until it's a smooth paste.


Yolks
Yolks and Sugar


2. In stainless steel bowl whisk yolks and sugar until light and fluffy (about 2 minutes). Set this mixture aside.


3. Over medium-high heat, heat chocolate milk mixture to scalding or 82 °C (milk begins to foam), stirring occasionally and remove.

Melted Chocolate


4. Add chocolate squares to heated chocolate milk mixture and stir until melted and smooth.


Chocolate Mixture


5. Pour the hot chocolate milk mixture into the yolk-sugar mixture whisking constantly.


6. Place bowl over simmering water, stir it constantly until it thickens and coats the back of a spoon.


7. Remove from heat and continue stirring. Add vanilla.

Mixing up some ice cream
8. Cover and refrigerate overnight.


9. Make ice cream according to your ice cream maker's instructions


                                                                                                              Enjoy!
                                                                                                                  Mel